Finding inspiration in everyday objects…

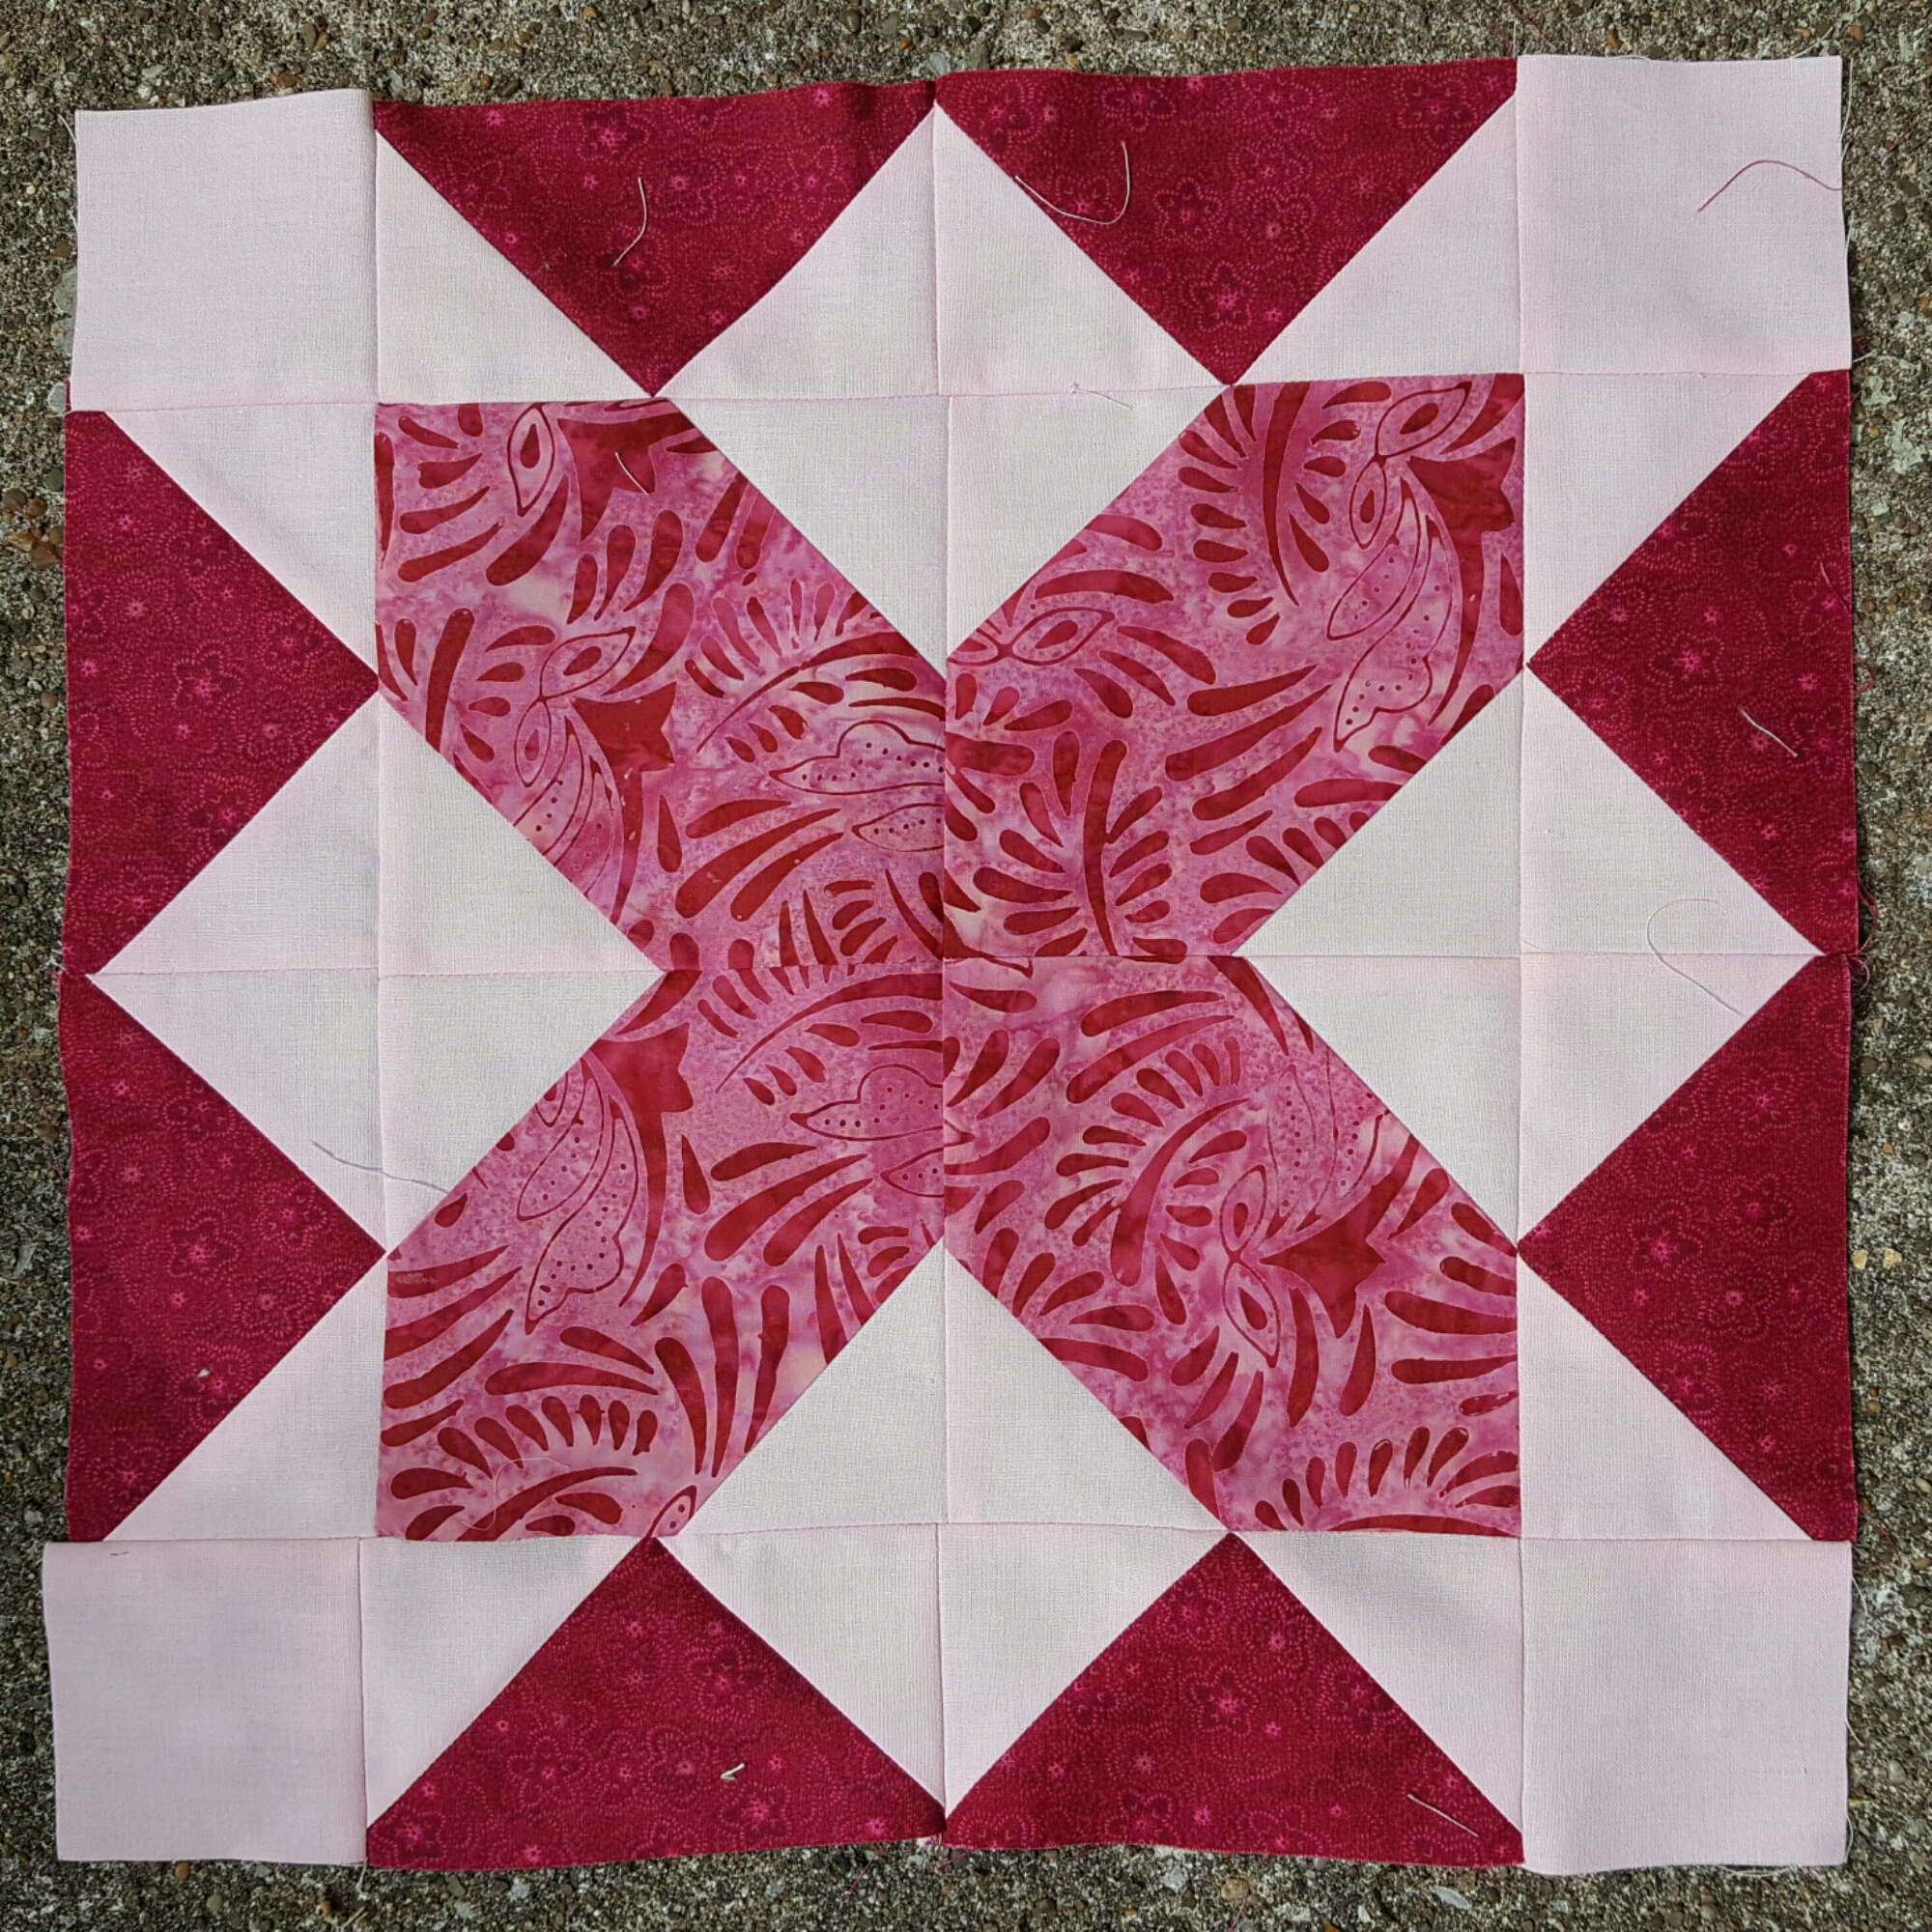
So I’ve had a really busy month and unfortunately, due to ill health, I haven’t been able to use my sewing machine or do my usual patchwork block of the month. I have to admit that I’d started to draft this blog post in August when I was able to use my machine and had made a new block after a trip to my Aunt’s house (I’ll expand more in a bit!). Luckily, being super eager/keen bean/organised paid off as it means I can keep up my NY resolution with my blog posts but just with a slightly different block than usual for this month. I am really hoping things will continue to improve and I will catch up for lost time by doing both the September and October blocks together next month! 

 I went to the Festival of Quilts during August having entered my first EPP quilt into the competitions. It wasn’t until I’d arrived and hunted down the quilt that I found a sign next to it saying “Highly Commended”. Cue the Mum taking lots of photos with me by the quilt, me by the sign, of the sign alone, of the quilt alone etc etc! Although it was a very long and tiring day (with lots of walking, shopping and photos) it was hugely exciting to have that recognition and to make the Mum proud! 

I have found that once you start doing patchwork (or even textiles in any form) it is really hard not to see inspiration in everyday objects! 

My boyfriend and I recently went to Italy and went past a beautiful old church but what really caught my attention was it’s roof…to me it looked like lots of mini hexagons – almost like an English Paper Piecing roof!! 

Maybe that subconsciously filtered through and influenced the 500+ 1/2″ hexagons that I basted whilst I was there…! 

Even the hotel logo had me thinking about the Tumbling Blocks pattern that is so popular within patchwork. It left me wondering whether I would have the right colours to replicate it myself once I got home…if not then I’m sure I could justify buying a bit more fabric for the ever-growing stash 😉 

This ‘inspiration in everday objects’ (or maybe just obsession) went one step further when I stayed at my Aunt’s house last month. I found myself looking at the pattern of her dressing gown and wondering how I could replicate it in patchwork! 

So I started to challenge myself to make a patchwork block based on the dressing gown! I tried to separate out sections of the block into more manageable pieces before working out the sizes for each piece (including seam allowance). 

Then with fingers crossed  (and breath held!) I translated this from paper to fabric to make my Dressing Gown block (in my own colours). 

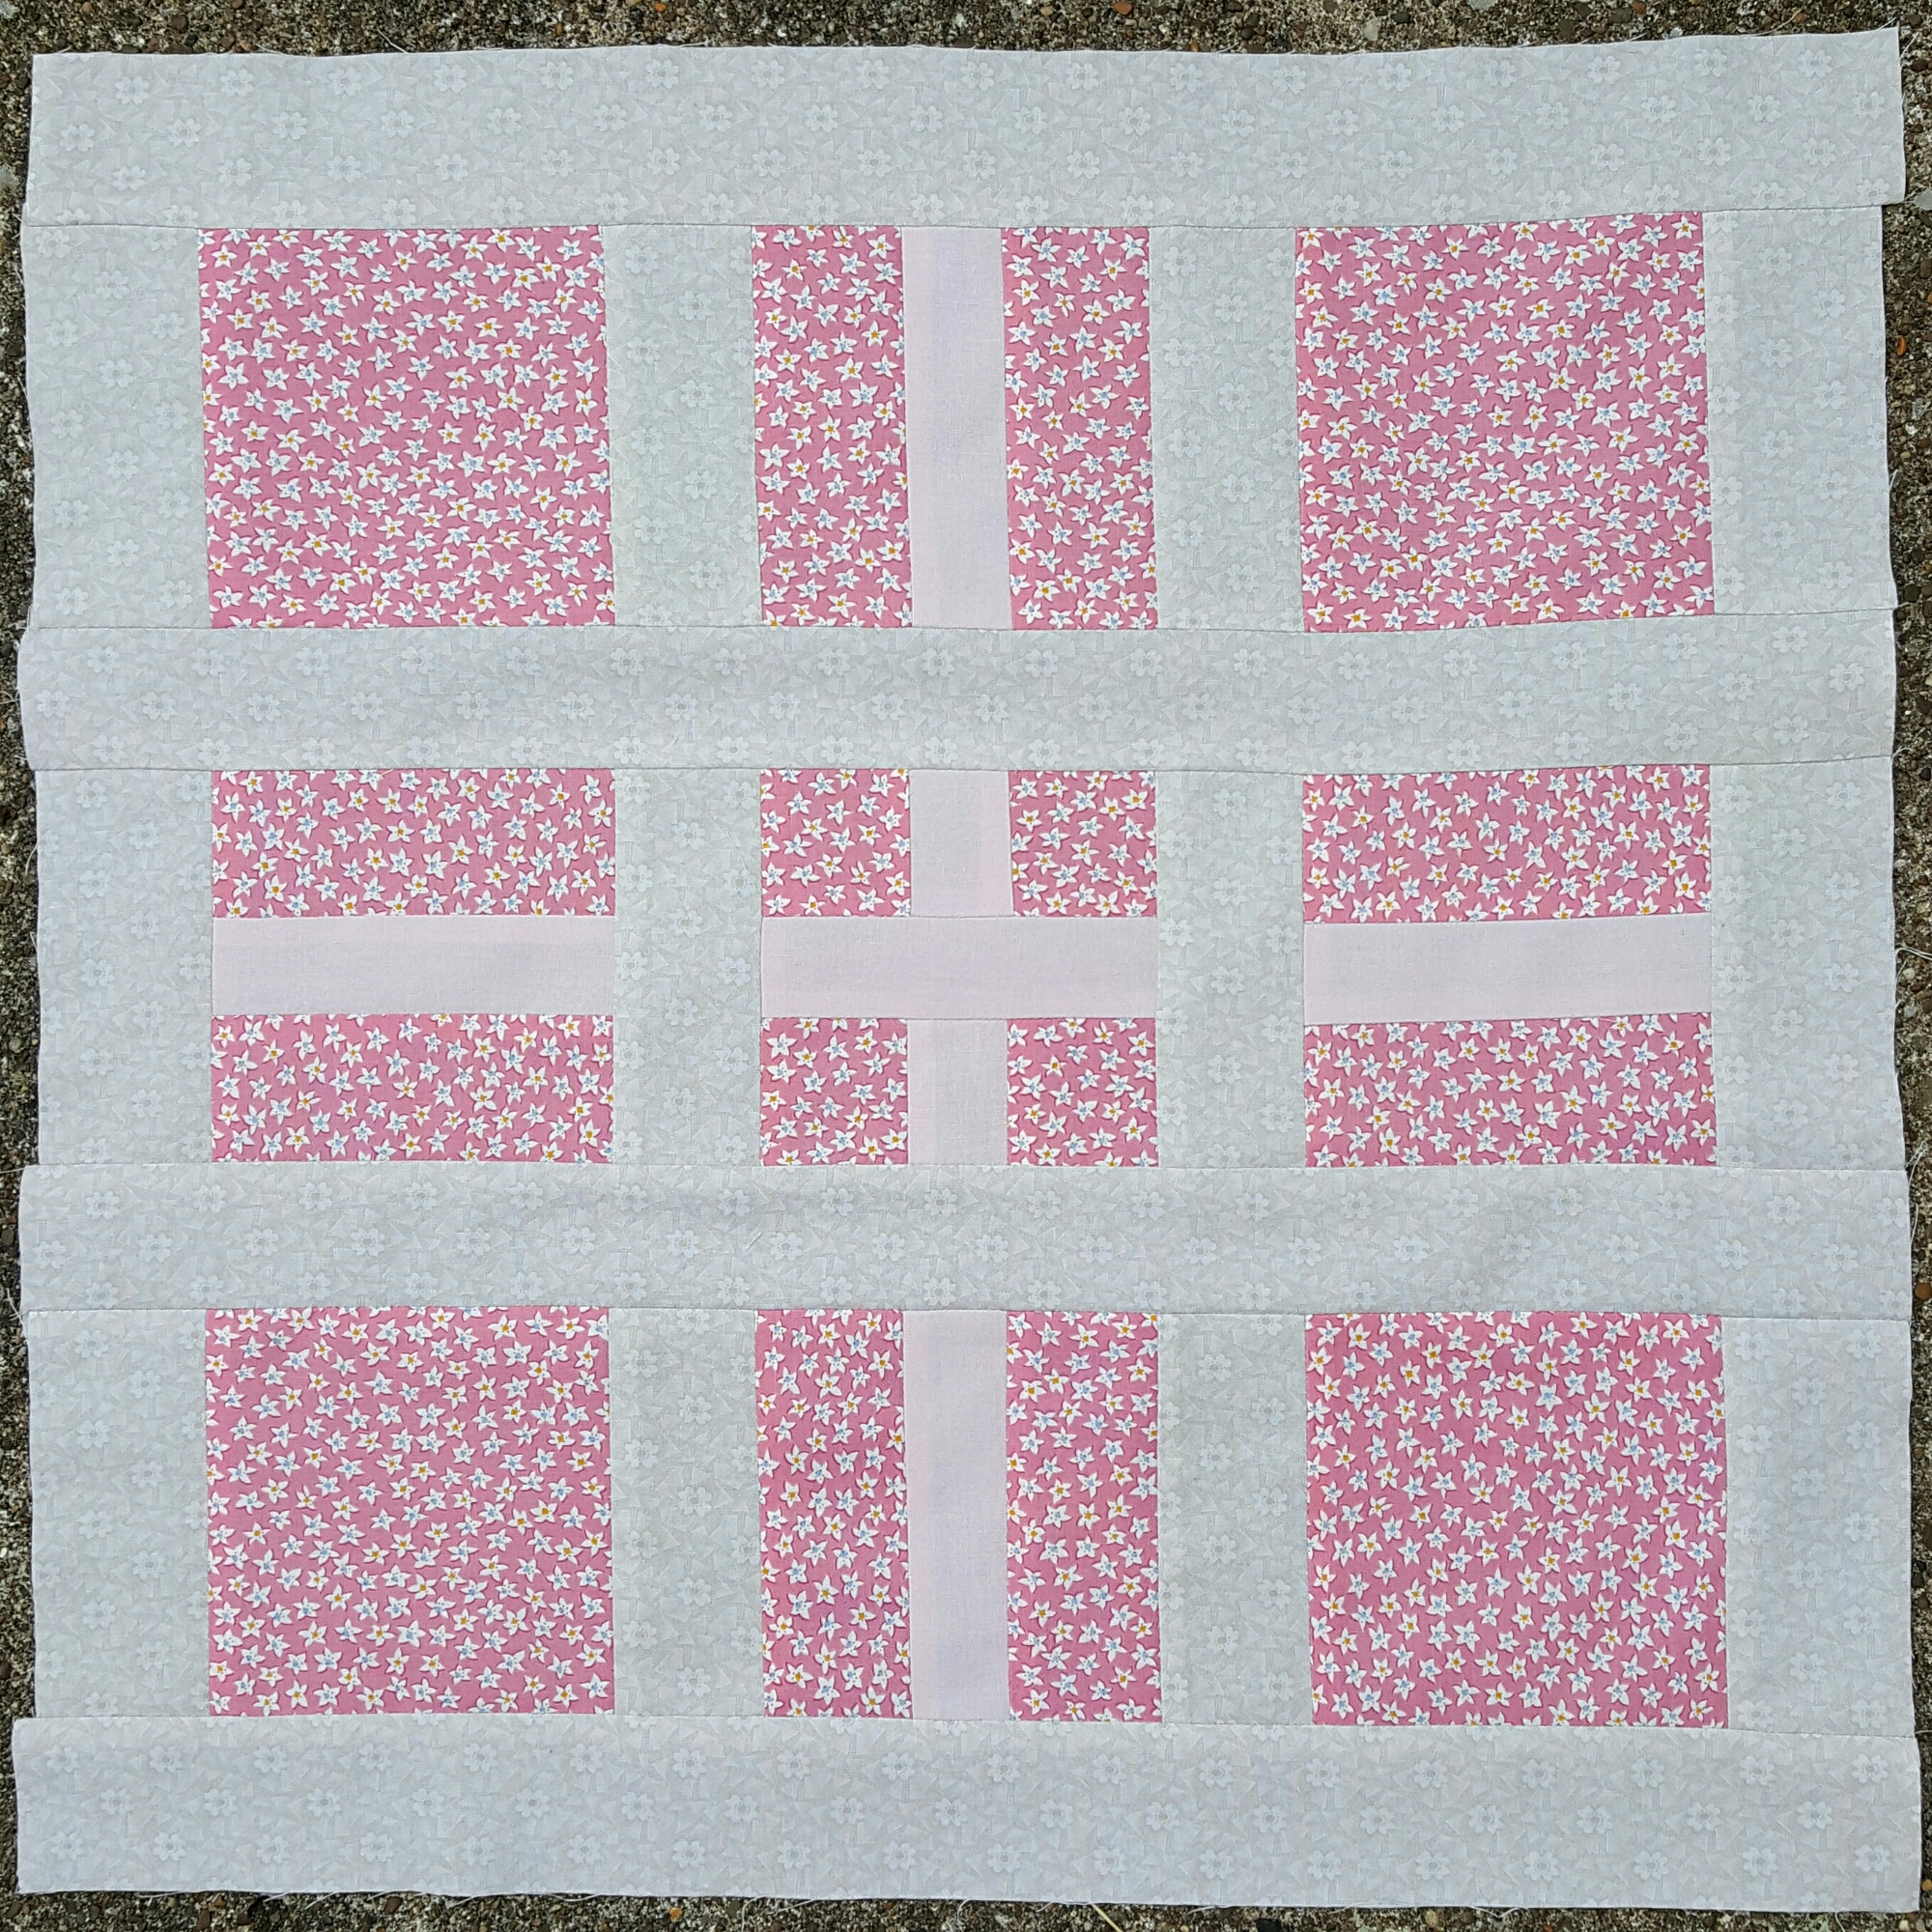
So whilst it isn’t an exact replica of the dressing gown I hope you can see this progression from object to paper to textiles! I hope to make several more of these blocks over the coming months and I can’t wait to show the photos as they come together to make my Dressing Gown quilt.

I guess this notion of finding patchwork patterns and inspiration in everyday objects means I am well and truly hooked!!

N x

Stitching with love

​I love the idea of creating a quilt for someone you love. As it develops you are holding them in mind and wondering if they’ll like the pattern, the colours, the texture and the design. With every stitch you are piecing together some sort of memory, thought
and emotion that is linked to that person and it is forming something tangible: a handcrafted quilt. That quilt then acts as a physical representation of the love and care you have for that person. I also feel this process of stitching for someone you love
echoes something of John Bowlby’s Attachment Theory as you are holding that person in mind during the making of the quilt even when they are not physically present. Also, through the process of making a quilt for that person there is so much love, care, attention and focus being put into it and the recipient can then envelope themselves in that quilt and that tangible representation
of the maker’s love for them. That way even when the maker of the quilt is not physically present the recipient can still feel their presence, care and thought as it is embodied in the quilt as the tangible representation of their love. 

I love this notion of creating a quilt and stitching for someone you love whilst incorporating shared memories into the texture, the colour and the pattern of the fabric. SO…with this in mind I am making a special 2016 quilt for my mum for Christmas! Each
time Mum and I have gone away or done something special during 2016 I have bought 2 fat quarters (a pre-cut piece of fabric) to commemorate it! I am using a pattern called Penny Tiles which was designed by
the fantastic Messy Jessie at Sew and Quilt (http://http://www.sewandquilt.co.uk/shop/jessie-fincham-penny-tiles-quilt-pattern-pdf/ ).
Mum and I both buy our English Paper Piecing templates from Sew and Quilt so it seemed like the perfect place to get the design for the quilt.

So I’ve recorded the memory behind each block here (also to partly help me to remember them when it comes to writing them down for the card to accompany the quilt at Christmas!

Block 1: Mum and I went away to Cornwall just after Christmas 2015 and we visited The Sewing Studio in Redruth which is where the first 2 fat quarters were bought!


Block 2: In February Mum and I went to London to see the exhibition Liberty in Fashion at the Fashion and Textile Museum. I bought 2 Liberty fat quarters from Alice Caroline to make this block: 

Block 3: At the start of March Mum and I had a girly day trip to Cardiff for Mother’s Day, pizza and shopping! We also went to Busy Bees Patchwork in Newport which is where I bought the 2 fat quarters to make this block: 

Block 4: Doughty’s came to Shirehampton! Reading through the local paper we saw that Doughty’s was visiting Shirehampton Village Hall and wow did they bring a lot of fabric! I also came across a local stitching group called Shire Stitchers (who had organised Doughty’s visit) so March was definitely a good month and I couldn’t resist adding these 2 fat quarters to the stash and to make block 4: 

Block 5: At the end of March/start of April we went back to Cornwall. We couldn’t travel all that way without visiting The Sewing Studio again so another 2 fat quarters were bought from there to make block 5: 

Block 6: For May Bank Holiday we went to Center Parcs with my Aunt, Uncle and cousin. Mum and I went into Warminster and I bought a fat quarter from Think Outside the Box which I used to make the centre of the block. We then went into a charity shop which had several metres of fabric including some by Andover and Makower so I used one of these fabrics (called Dimples) for the triangles around the edges. 

Block 7: This block was made using 2 fat quarters that I bought from Pins and Needles in New York: 

Block 8: This block was made using 2 fat quarters from The City Quilter in New York: 

Block 9: This is the most recent block made using fat quarters from Amsterdam. The centre of the block was made from a Robert Kaufman fat quarter which I bought in Birdblocks and the outer triangles were made from a Dutch Heritage fat quarter bought in Den Haan and Wagenmakers: 

Edit
So I’ve made 9 ‘blocks’ so far and hope to have 12 ‘blocks’ by the end of the year…I just hope I quilt it and bind it in time for Christmas!! 

Ps. I’m still going with the New Year’s Resolution of learning a new patchwork block each month! This is my August block: 

Sewing in Amsterdam

It’s beginning to sound like I am a little jet setter! I’m really not – I’ve just been lucky to have these opportunities towards the end of term when the uni workload is lighter!
I arrived in Amsterdam with my Mum 2 days ago and I have fallen in love with this city all over again!

image

Everywhere is just beautiful, the buildings are stunning and the people are friendly! As well as having been to the Van Gogh Museum yesterday and the Anne Frank House today we have also found some knitting/quilting/bead shops!!
We first went to De Afstap (12 Oude Leliestraat) which had a range of wools and threads and an even greater range of books and patterns. It isn’t cheap but it is definitely worth a visit just because of all the gorgeous things that they sell! I was tempted to buy lots of gorgeous wool but I had to keep reminding myself I don’t actually knit often! Maybe one day….

image

Afterwards we went to Birdblocks (99 Nieuwezijds Voorburgwal). Now this shop is fantastic! A wide range of fabrics, threads, needles, patterns and an absolute must-visit! The lady who served us was really friendly too and that makes all the difference!

image

I bought a pink fat quarter for my special 2016 quilt (which I will blog about next month) by Darlene Zimmerman for Robert Kaufman:

image

They also had a range of fabrics from the Kaffe Fassett collective and whilst they weren’t cheap I just couldn’t resist!

image

Then right next door to Birdblocks is Den Haan & Wagenmakers B.V. (95 Nieuwezijds Voorburgwal). Again, this place was beautiful and the lady was very friendly.

image

They had such a beautiful range of Dutch Heritage fabrics and I couldn’t resist these two for my 2016 quilt:

image

Then after a long day of walking (and shopping) we passed Copenhagen Kralen Beads (54 Rozengracht):

image

Thousands of beads that have been meticulously colour coordinated and ordered in jars that line every wall in the shop!
Now we have arrived back (or rather collapsed back) at our Air bnb apartment (an apartment which is up 68 stairs and a mean feat in itself!)
Time for a well-earned cold drink I think!
Speak soon.
N xx

July – New York Stripey Quilt

Happy July!! It was my birthday yesterday and I was treated to lots of new, yummy fabric so I am feeling like one very lucky girl!! I am also on the home stretch of my dissertation with only the final draft left to do. It’s coming together nicely so I treated myself to a day of sewing whilst watching Wimbledon!! Using the fabrics I bought during my trip to NYC last month I played around with triangles until I reached this design:

image

I am really pleased with this and it is made using 1/4 yard of 9 different fabrics all bought from The City Quilter in NYC.
Ps. If following the pattern you might want to grab a pencil and paper to help with labels and keeping track of the order they go in!

The pattern:
I used the sizzix bigz die for a triangle
measuring 4 5/8inch (height) by 8 1/2inch (width) but it is probably much easier just to cut them!
Fabric A: cut 7 triangles –

image

Fabric B: cut 7 triangles –

image

Fabric C: cut 9 triangles –

image

Fabric D: cut 12 triangles –

image

Fabric E: cut 12 triangles –

image

Fabric F: cut 12 triangles –

image

Fabric G: cut 12 triangles –

image

Fabric H: cut 12 triangles –

image

Fabric I: cut 12 triangles –

image

Then make the following pairs from the triangles to form squares:

Pair 1 D with 1 A to make 1 square = A1

image

Pair 1 A with 1 F 5 times to make a total of 5 squares = A2

image

Pair 1 F with 1 B 3 times to make a total of 3 squares = A3

image

Pair 1 B with 1 G 4 times to make a total of 4 squares = A4

image

Pair 1 G with 1 D 5 times to make a total of 5 squares = A5

image

Pair 1 D with 1 E 6 times to make a total of 6 squares = A6

image

Pair 1 E with 1 I 6 times to make a total of 6 squares = A7

image

Pair 1 I with 1 H 6 times to make a total of 6 squares = A8

image

Pair 1 H with 1 C 5 times to make a total of 5 squares = A9

image

Pair 1 C with 1 F 4 times to make a total of 4 squares = A10

image

Pair 1 A with 1 G 2 times to make a total of 2 squares = A11

image

Pair 1 G with 1 H to make 1 square = A12

image

Then I joined these squares together to make rows (a total of 8).
So in row 1, from top to bottom, join the squares in the following order: A8, A9, A10, A2, A11, A12:

image

In row 2, from top to bottom, join the squares in the following order: A7, A8, A9, A10, A2, A11:

image

In row 3, from top to bottom, join the squares in the following order: A6, A7, A8, A9, A10 and A2:

image

In row 4, from top to bottom, join the squares in the following order: A5, A6, A7, A8, A9, A10:

image

In row 5, from top to bottom, join thesquares in the following order: A4, A5, A6, A7, A8, A9:

image

In row 6, from top to bottom, join the squares in the following order: A3, A4, A5, A6, A7, A8:

image

In row 7, from top to bottom, join the squares in the following order: A2 (rotated 180 degrees – see photo below), A3, A4, A5, A6, A7:

image

image

In row 8, from top to bottom, join the squares in the following order: A1, A2 (with the 180 degree rotation as in row 7), A3, A4, A5, A6:

image

Then join these rows together starting with row 1 on the far left through to row 8 on the far right:

image

Now just the quilting to do!! And I’ve bought myself a walking foot which I am keen to try out so that’ll be my next task! Enjoy the rest of your July! 🙂
N xx
Ps. For the eagle-eyed of you…this is what happens when you don’t double check before cutting your fabric – you end up with the selvedge showing in your quilt!! Oops!

image

Pps. I have made the July block too so I am still going with the NY resolution of learning a new patchwork block each month!! For July I made the ‘Staircases’ block from the Amy Butler 20 Simple Block Designs booklet that came with issue 4 of Love Patchwork and Quilting:

image

Sewing in NYC

I spent four nights in NYC at the end of May and when I arrived at my hotel I was greeted by a sign saying I was staying in Garment District and this giant button and needle was at the end of my road (block?!)

image

I promise it was purely by chance!! But it meant I couldn’t wait to drop off the suitcase and start exploring! !
The first shop I went into was Daytona Trimmings (251 W. 39th Street) and I was greeted by this (rather large!) cat as well as racks and racks of all sorts of beautiful ribbons

image

After doing workshops with Janet Haigh at Heart Space Studios based on her book Little Ribbon Patchwork and Applique I have been hooked on building a ribbon stash!

image

So I dutifully bought myself a yard (American measurements!) of this ribbon. Both the front and back are as beautiful as each other (front of the ribbon is the photo on the left, back of the ribbon is the photo on the right)!

image

The following day I came across M&J Trimming (1008 Sixth Avenue).

image

This store was even larger with mood boards adorning the walls that were beautiful in themselves!

image

Again, there were so many ribbons it was hard to choose!

image

I settled on this ribbon because I loved the colours of the floral pattern plus the back was gorgeous too (front of the ribbon in the top photo, back of the ribbon in the bottom photo).

image

On Tuesday, after accidentally getting the wrong subway (oops!), we travelled through Central Park to get to Pins and Needles (1045 Lexington Avenue) – I was a girl on a mission!!

image

The owner was incredibly friendly and welcoming and the fabrics in the shop were just stunning! There was also a gorgeous selection of Liberty Tana Lawn!

image

I couldn’t resist the ribbon again and ended up buying a quarter yard of these two to add to my rapidly growing NYC ribbon stash (the front of the ribbons are in the top photo, the back of the ribbons are in the bottom photo)!

image

I also bought two pink fat quarters. I am making a 2016 memories quilt so during this year every time I go away or go somewhere special I am trying to buy 2 (pinkish) fat quarters to go in my quilt as a memory of that trip or occassion (I’ll do another blog post on this to itself!)

image

Finally, I visited The City Quilter (133 West, 25th Street) on the morning of my last day – I’d saved it until the last day because I had a feeling it would be too tempting otherwise!! It was incredible – like an Aladdin’s Cave of all things fabric-y!

image

I also bought another two pinky fat quarters from here to add to the 2016 memories quilt.

image

And then I just couldn’t resist so I bought quarter yards of these too…

image

image

image

And inbetween all these ribbons, trimmings and fat quarters I even managed to see the sights of NYC too!!
Hope you are enjoying this gorgeous June sunshine!
N xx

June Block – Little Boxes

I’m still slightly jetlagged and exhausted having been to NYC during half term (this may need a blog post all to itself with pictures of the fabrics and ribbons I bought en route!). But I felt I needed a slightly easier block to do this month that wouldn’t be too taxing! So for June I have done the Little Boxes block (still using Amy Butler’s 20 Simple Block Designs from issue 4 of Love Patchwork and Quilting).

image

You’ll need three different fabrics. Cut four squares measuring 3 1/2 inches  (fabric A). From fabric B cut four pieces measuring 2inches by 6 1/2 inches (B1) and four pieces measuring 2inches by 3 1/2 inches (B2). From fabric C cut four pieces measuring 2inches by 6 1/2 inches (C1) and four pieces measuring 2inches by 3 1/2 inches (C2). A quarter inch seam allowance was used throughout.

image

Sew a B2 strip either side of your fabric A square:

image

Then sew a B1 strip on the other 2 edges of your fabric A square:

image

Then repeat this process by sewing a C2 strip either side of a fabric A square:

image

And then sew a C1 strip on the other 2 edges of a fabric A square:

image

Then join these two squares together:

image

Repeat these steps again so you have two sets of these joined two squares. Then join these two two-squares together to make a four patch final block:

image

Ta da!! The June block is finished!!
Looking forward to July already but I hope to post about NYC before then.
N xx

May block – tackling quarter square triangles

I’ve finished the literature review and the methodology chapter for my dissertation so I have decided to treat myself to some sewing before I buckle down for the next essay!!
So this month I did a ‘Quarter Square Triangle Nine-Patch Block’ (still using the  Amy Butler 20 Simple Block Designs that came with issue 4 of Love Patchwork and Quilting).

image

I started by cutting out three 5 1/2 inch squares from fabric A and three 5 1/2 inch squares from fabric B.

image

These two fabrics will make the quarter square triangles. I then cut out four 4 1/2 inch squares from fabric C.

image

To make the quarter inch squares I drew a horizontal line along the diagonal of the wrong side of each fabric A square.

image

I then paired it with a fabric B square and (right sides together) I sewed a line 1/4 inch either side of the original drawn horizontal line. Once sewn, I cut down the original horizontal line.

image

Then I opened these and pressed them.

image

Then, I placed two of these new square units right sides together with fabric A being placed on top of fabric B etc. I then repeated the process of drawing a new horizontal line and then sewing a line 1/4 either side of the horizontal line (hopefully the photos will make it seem more understandable!)

image

Once sewn, I cut along that second horizontal line, opened them and pressed them.

image

And hey presto! Quarter square triangles!

image

Then, I trimmed these quarter square triangles to 4 1/2 inch squares.
Next, I made three rows combining the quarter square triangles and fabric C.
Row 1 = quarter square triangle, fabric C, quarter square triangle.
Row 2 = fabric C, quarter square triangle, fabric C.
Row 3 = quarter square triangle, fabric C, quarter square triangle.

image

Then I joined these rows together to make the final Quarter Square Triangle Nine-Patch Block!

image

I hope you are enjoying May – not long until bank holiday now!!
N xx

April Block

Time seems to fly by at the moment! So before I started any essay writing for today I’ve started with something nice – my April block! I think it might be my fav so far and definitely the easiest!

So I’ve used the ’20 Simple Block Designs’ booklet from Love Patchwork and Quilting issue 4 again to make a ‘Boxes Inside Boxes’ block. You’ll need three different fabrics.

image

Start by cutting a 3 1/2inch square from your chosen fabric for the centre of the block.

image

From your second fabric cut two strips measuring 2 inches by 6 1/2 inches (A) and two strips measuring 2 inches by 9 1/2 inches (B).

image

Then from your third fabric cut two strips measuring 2 inches by 3 1/2 inches (C), two strips measuring 2 inches by 6 1/2 inches (D), two strips measuring 2 inches by 9 1/2 inches  (E) and two strips measuring 2 inches by 12 1/2 inches (F).

image

When joining all the strips I used my quarter inch foot – it is fast becoming my life saver when sewing!! I also found it helpful to write a little label next to each strip so that I could remember their letter when it came to joining them all together
Sew the C strips to the top and bottom of your square and then press.

image

Sew the D strips to the sides of your square/rectangle and press.

image

Sew the A strips to the top and bottom of your square.

image

Sew the B strips to the sides of your square/rectangle.

image

Sew the E strips to the top and bottom of your square.

image

Finally, sew the F strips to the sides of your square/rectangle. And it’s finished!

image

Easy as A, B, C (…..and D, E, F!). Such a simple block but I really enjoyed doing it – I hope you do too! See you next month 🙂
N x

March patchwork block

Happy Easter!! I was treated to some beautiful new Tilda Fat Quarters as an Easter pressie from my mum and I can’t resist sharing a photo – aren’t the colours gorgeous? !

image

So it’s been a busy month which means I’ve only just managed to do my March block today!
I used the Amy Butler ’20 Simple Block Designs’ booklet again (which came with Love Patchwork and Quilting) to make the block ‘North, South, East and West’.

image

I cut out eight rectangles measuring 3 1/2 inches by 6 1/2 inches from the fabric Botanique by Joel Dewberry for Freespirit. I then used four shades of Moda pastels to cut out four 3 1/2 inch squares from each shade.

image

Then it got tricky! I placed one square on top of one end of a rectangle right sides together. I then made a diagonal line using a fabric pen to sew along.

image

Once sewn, trim the excess and press. Then repeat the same thing but at the other end of the rectangle. Once this is sewn, trimmed, pressed and opened up it should look like this!

image

So I made two of these for each pastel shade making a total of 8 units. These units were then sewn into sets of 4 units.

image

And then these four units were sewn together, rotating a quarter turn each time! The finished block looks like this 🙂

image

I found it really difficult to make sure the points of my triangles stay in tact when I am joining these pieces together  – if anyone can recommend how I can make sure I get the points in the flying geese units I’d really appreciate it!
I hope you have had a lovely Easter! See you next month 🙂
N x

February block

Happy leap year day!! An extra 24 hours this month to get my February block done!! So for this month, I followed a set of instructions for a block design featured in issue 4 of Love Patchwork and Quilting (a great mag!).

image

So, I chose my six fabrics for this block, ironed them and then cut them into strips measuring 1 1/2 inches by 6 1/2 inches:

image

I then made four squares of six strips by joining the strips together making sure that I used the quarter inch foot on my sewing machine:

image

Once I had four squares, I then paired them by joining two squares together, rotating each square by a quarter turn each time. It sounds a lot more complicated than it really is!!

image

When I had two twos, I joined them together to make the final square. I had to double check this join a couple of times to make sure that I got the quarter turn right! ! Once I had joined them all together I had the final big square – the February block! !

image

Now just for a final iron! !
It wasn’t as much fun to do as the pinwheel and when looking at the square as a whole I am not sure about the blue fabric strip…but making mistakes is all part of the learning journey right? !
Enjoy your extra 24 hours whatever you are doing 🙂
N xx